Fermentation is “controlled spoilage” as different techniques speed up or slow down a particular process. Depending on the control, the fermentation can create a range of flavours from very mild to super strong and sometimes even intolerable. On the other hand, if you control the “spoilage” too well, the flavours could be almost non-existent, although with a long shelf life.
This could be very useful for manufacturers and retailers making large quantities and requesting a long shelf life, but this rarely suits the consumers who might prefer a more saturated or traditional flavour.
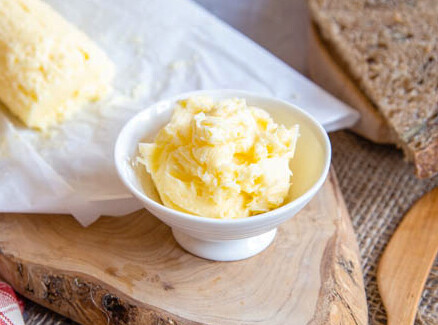
To make sweet butter, please get 1L of heavy or double cream with no preservatives and other additives. It would be best to use not homogenised cream as the fat globules are intentionally made smaller than usual.
- Place in a large bowl and start mixing (using an electric mixer) or add to a food processor as you leave some space for an eventual expansion of the cream.
- The cream will become harder and yellowish after 5 to 7 minutes. Keep going; gradually, for about 10 minutes, the volume of the cream will reduce, and the texture will become grainy with tiny particles of butter. Next, the mixture will become more liquid, and the butter particles will separate from the buttermilk. Do not over whisk: stop when you hear the sound of splashing.
- Use a strainer or cheesecloth to remove the buttermilk (and keep it for something else)
- Then rinse the butter with cold water (do not use any warm, lukewarm water)
- Using hands or fingertips, press or squeeze the butter for a short so it does not melt further but extract any liquid left. You can do this in a new bowl just taken from the fridge to avoid over-melting. If the butter becomes too soft, you can place it in the refrigerator for a while.
- Form in rolls, cut if you like in any other shape and keep in the refrigerator.
There is an additional step for cultured butter that might take several hours.
- Pour 1L of heavy or double cream with no preservatives and additives and not homogenised in a large bowl and add 1 gram of freeze-dried starter( Mild Kefir, Nordic Style, Bulgarian) and incubate for 8-10 hours in an electric maker or a bit more with the non-electric maker.
If you use 1-2 spoons of ready kefir or ready yogurt, incubate for an hour or two max.
- After this time, the cream will start thickening slightly, so check it frequently as you need to whisk it until still liquid but acidified a bit.
However, you will not notice significant changes in texture and flavour; if thick, you incubated for too long, but then stir well and continue with the next step.
- Mix with an electric mixer or in a food processor as you leave some space for an eventual expansion of the mix
- The cream will become harder and yellowish after 5 to 7 minutes. Keep going; gradually, for about 10 minutes, the volume of the cream will reduce, and the texture will become grainy with tiny particles of butter. Next, the mixture will become more liquid, and the butter particles will separate from the buttermilk. Do not over whisk: stop when you hear the sound of splashing.
- Use a strainer or cheesecloth to remove the buttermilk (and keep it for something else)
- Then rinse the butter with cold water (do not use any warm, lukewarm water)
- Using hands or fingertips, press or squeeze the butter for a short so it does not melt further but extract any liquid left. You can do this in a new bowl just taken from the fridge to avoid over-melting. If the butter becomes too soft, you can place it in the refrigerator for a while.
- Form in rolls, cut if you like in any other shape and keep in the refrigerator.
You also can add herbs and spices if you like, then form them into rolls and enjoy